Campaign Monitor
Connect Campaign Monitor to CoEditor CRM, sync lists, and automate list membership and custom fields from CRM events.
Campaign Monitor is an email marketing platform where you manage subscriber lists, send campaigns, and segment audiences. You can place contacts on different lists and use custom fields (for example SubscriberStatus) to filter who receives a message—such as active subscribers for newsletters, or lapsed or unsubscribed users for win-back campaigns.
CoEditor CRM pushes customer data into Campaign Monitor when system events fire (including events from Stripe or Piano once those integrations are connected).
This guide walks through setup in order: connect Campaign Monitor, sync your lists, review custom fields, then create automation rules.
Path: /publications/{publicationId}/settings/campaign-monitor · You need admin access to the publication.
Step 1 — Open Campaign Monitor settings
- Open your publication in the CRM.
- In the left sidebar, click Settings.
- In the settings navigation, select Campaign Monitor.
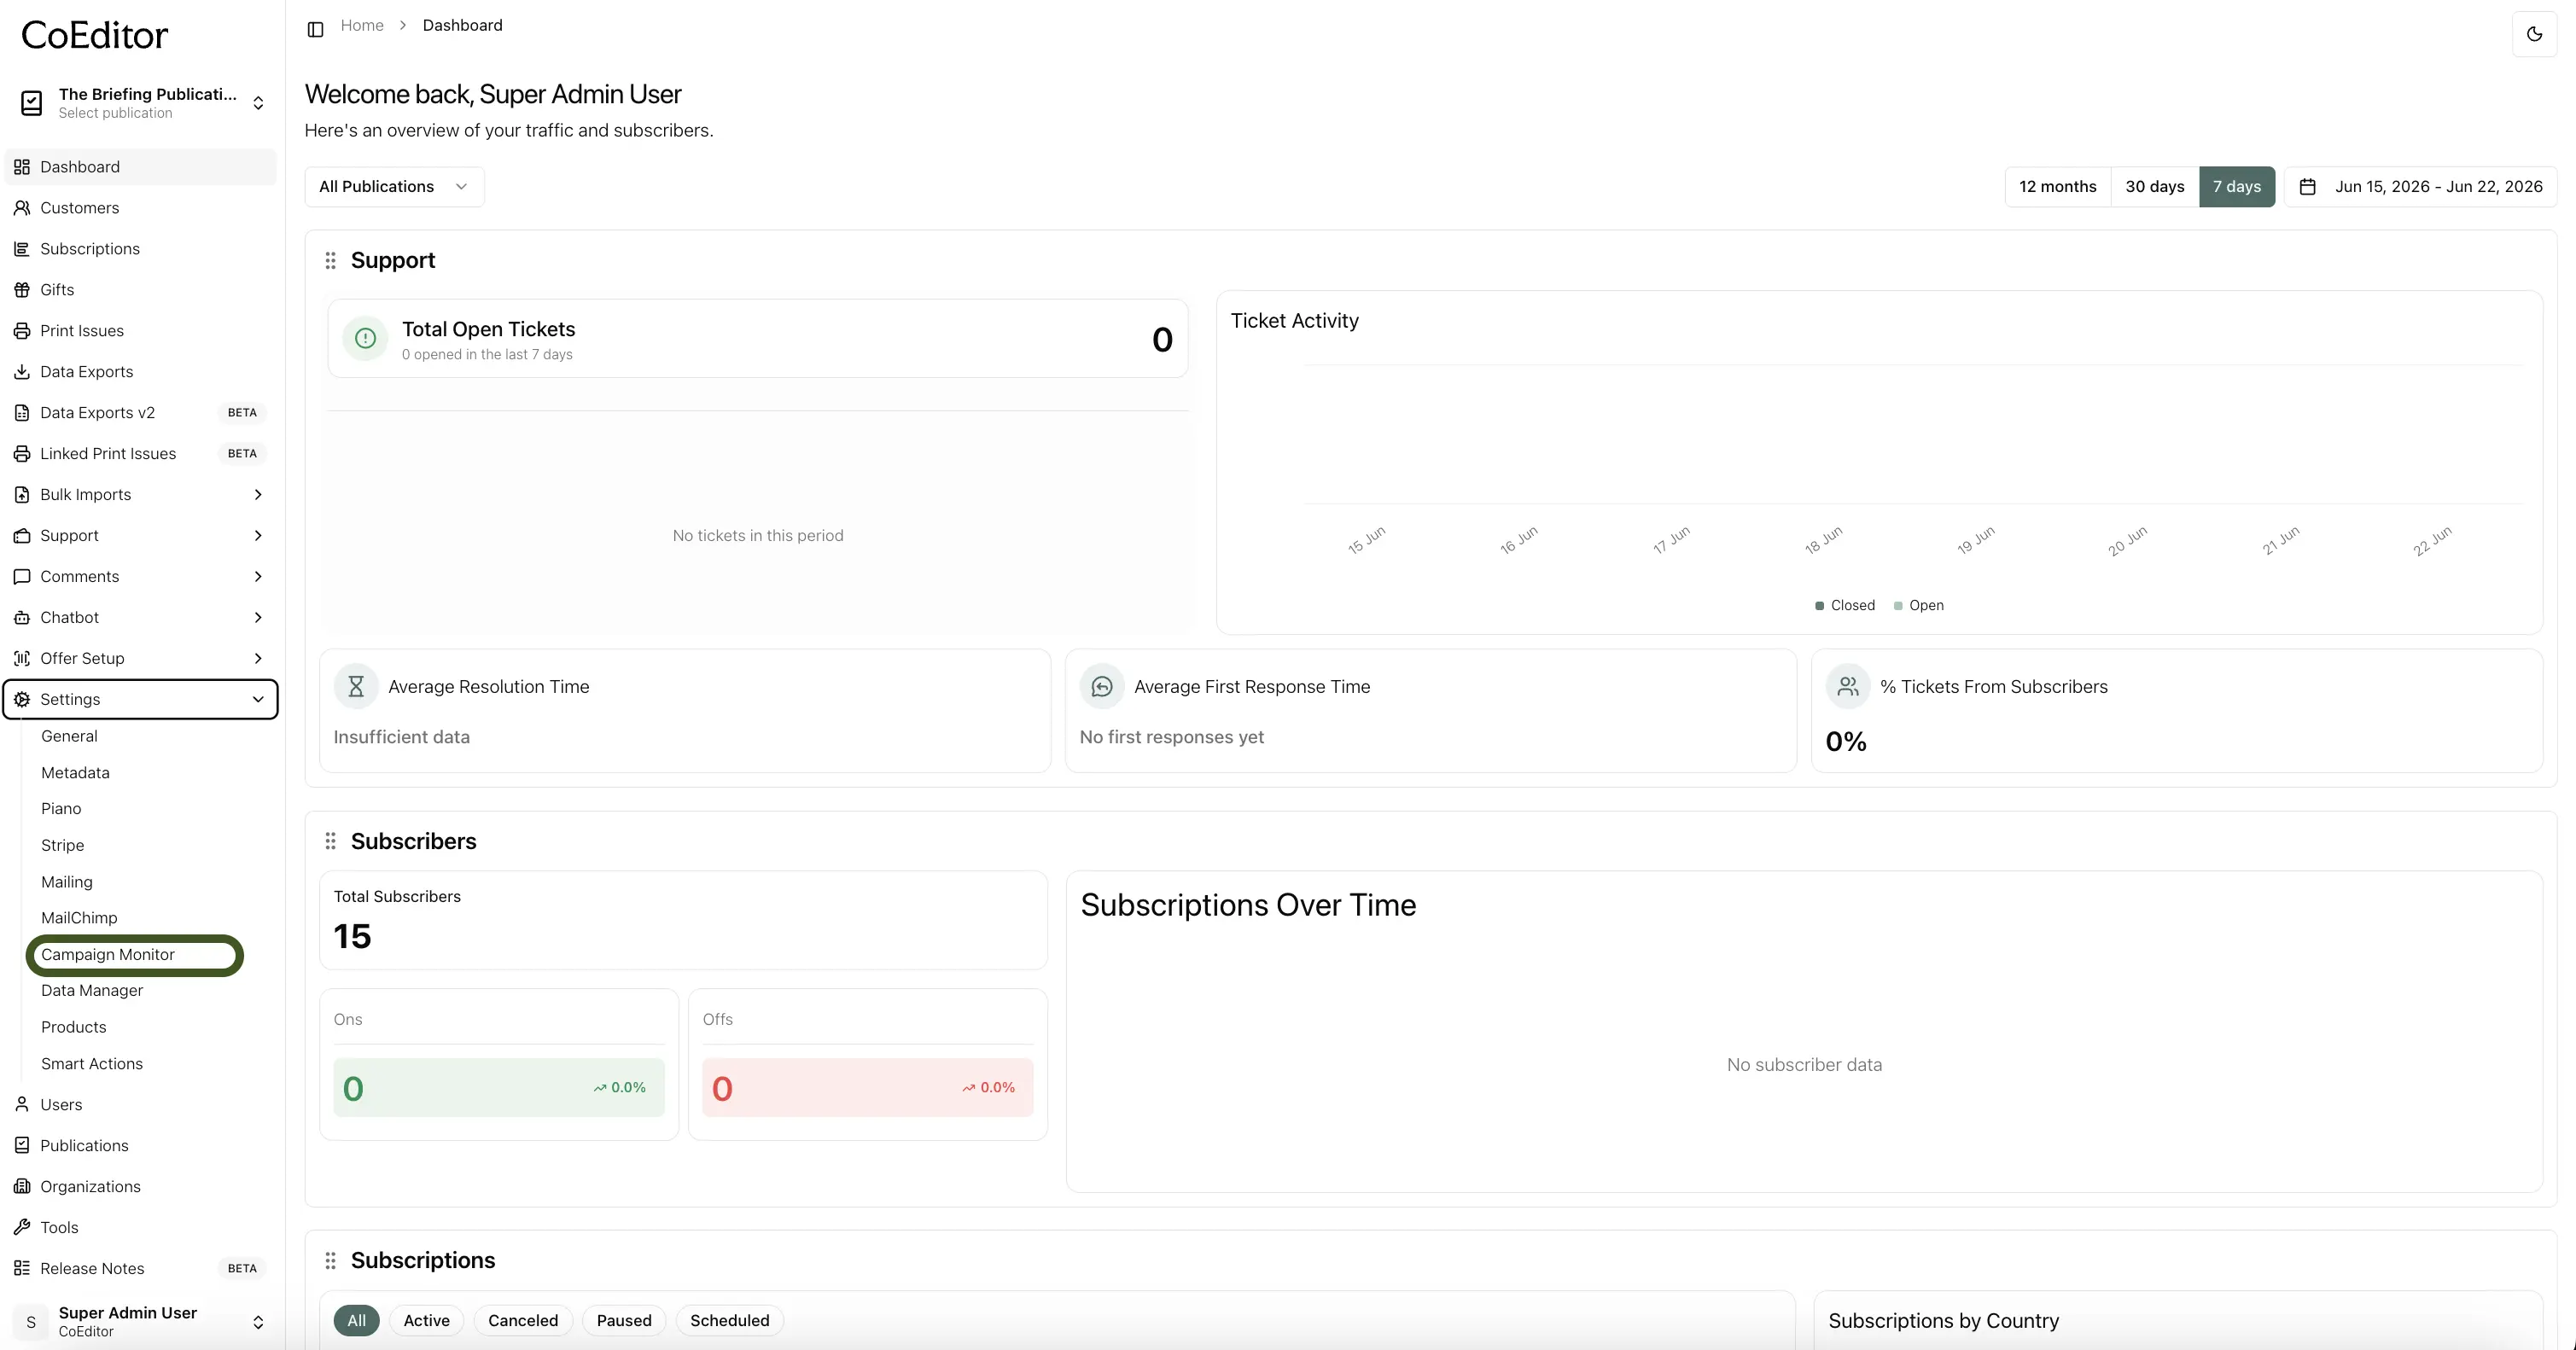
Step 2 — Connect and verify credentials
On the Connection Setup card at the top of the page:
- Enter your API Key — from your Campaign Monitor account settings.
- Enter your Client ID — your Campaign Monitor client ID.
- Optionally enter a Campaign Monitor Identifier — a custom label to distinguish this publication in Campaign Monitor.
- Click Verify Credentials — CoEditor checks it can reach Campaign Monitor.
- Click Save Configuration.
- Turn on Enable Integration when you are ready to sync lists and create rules.
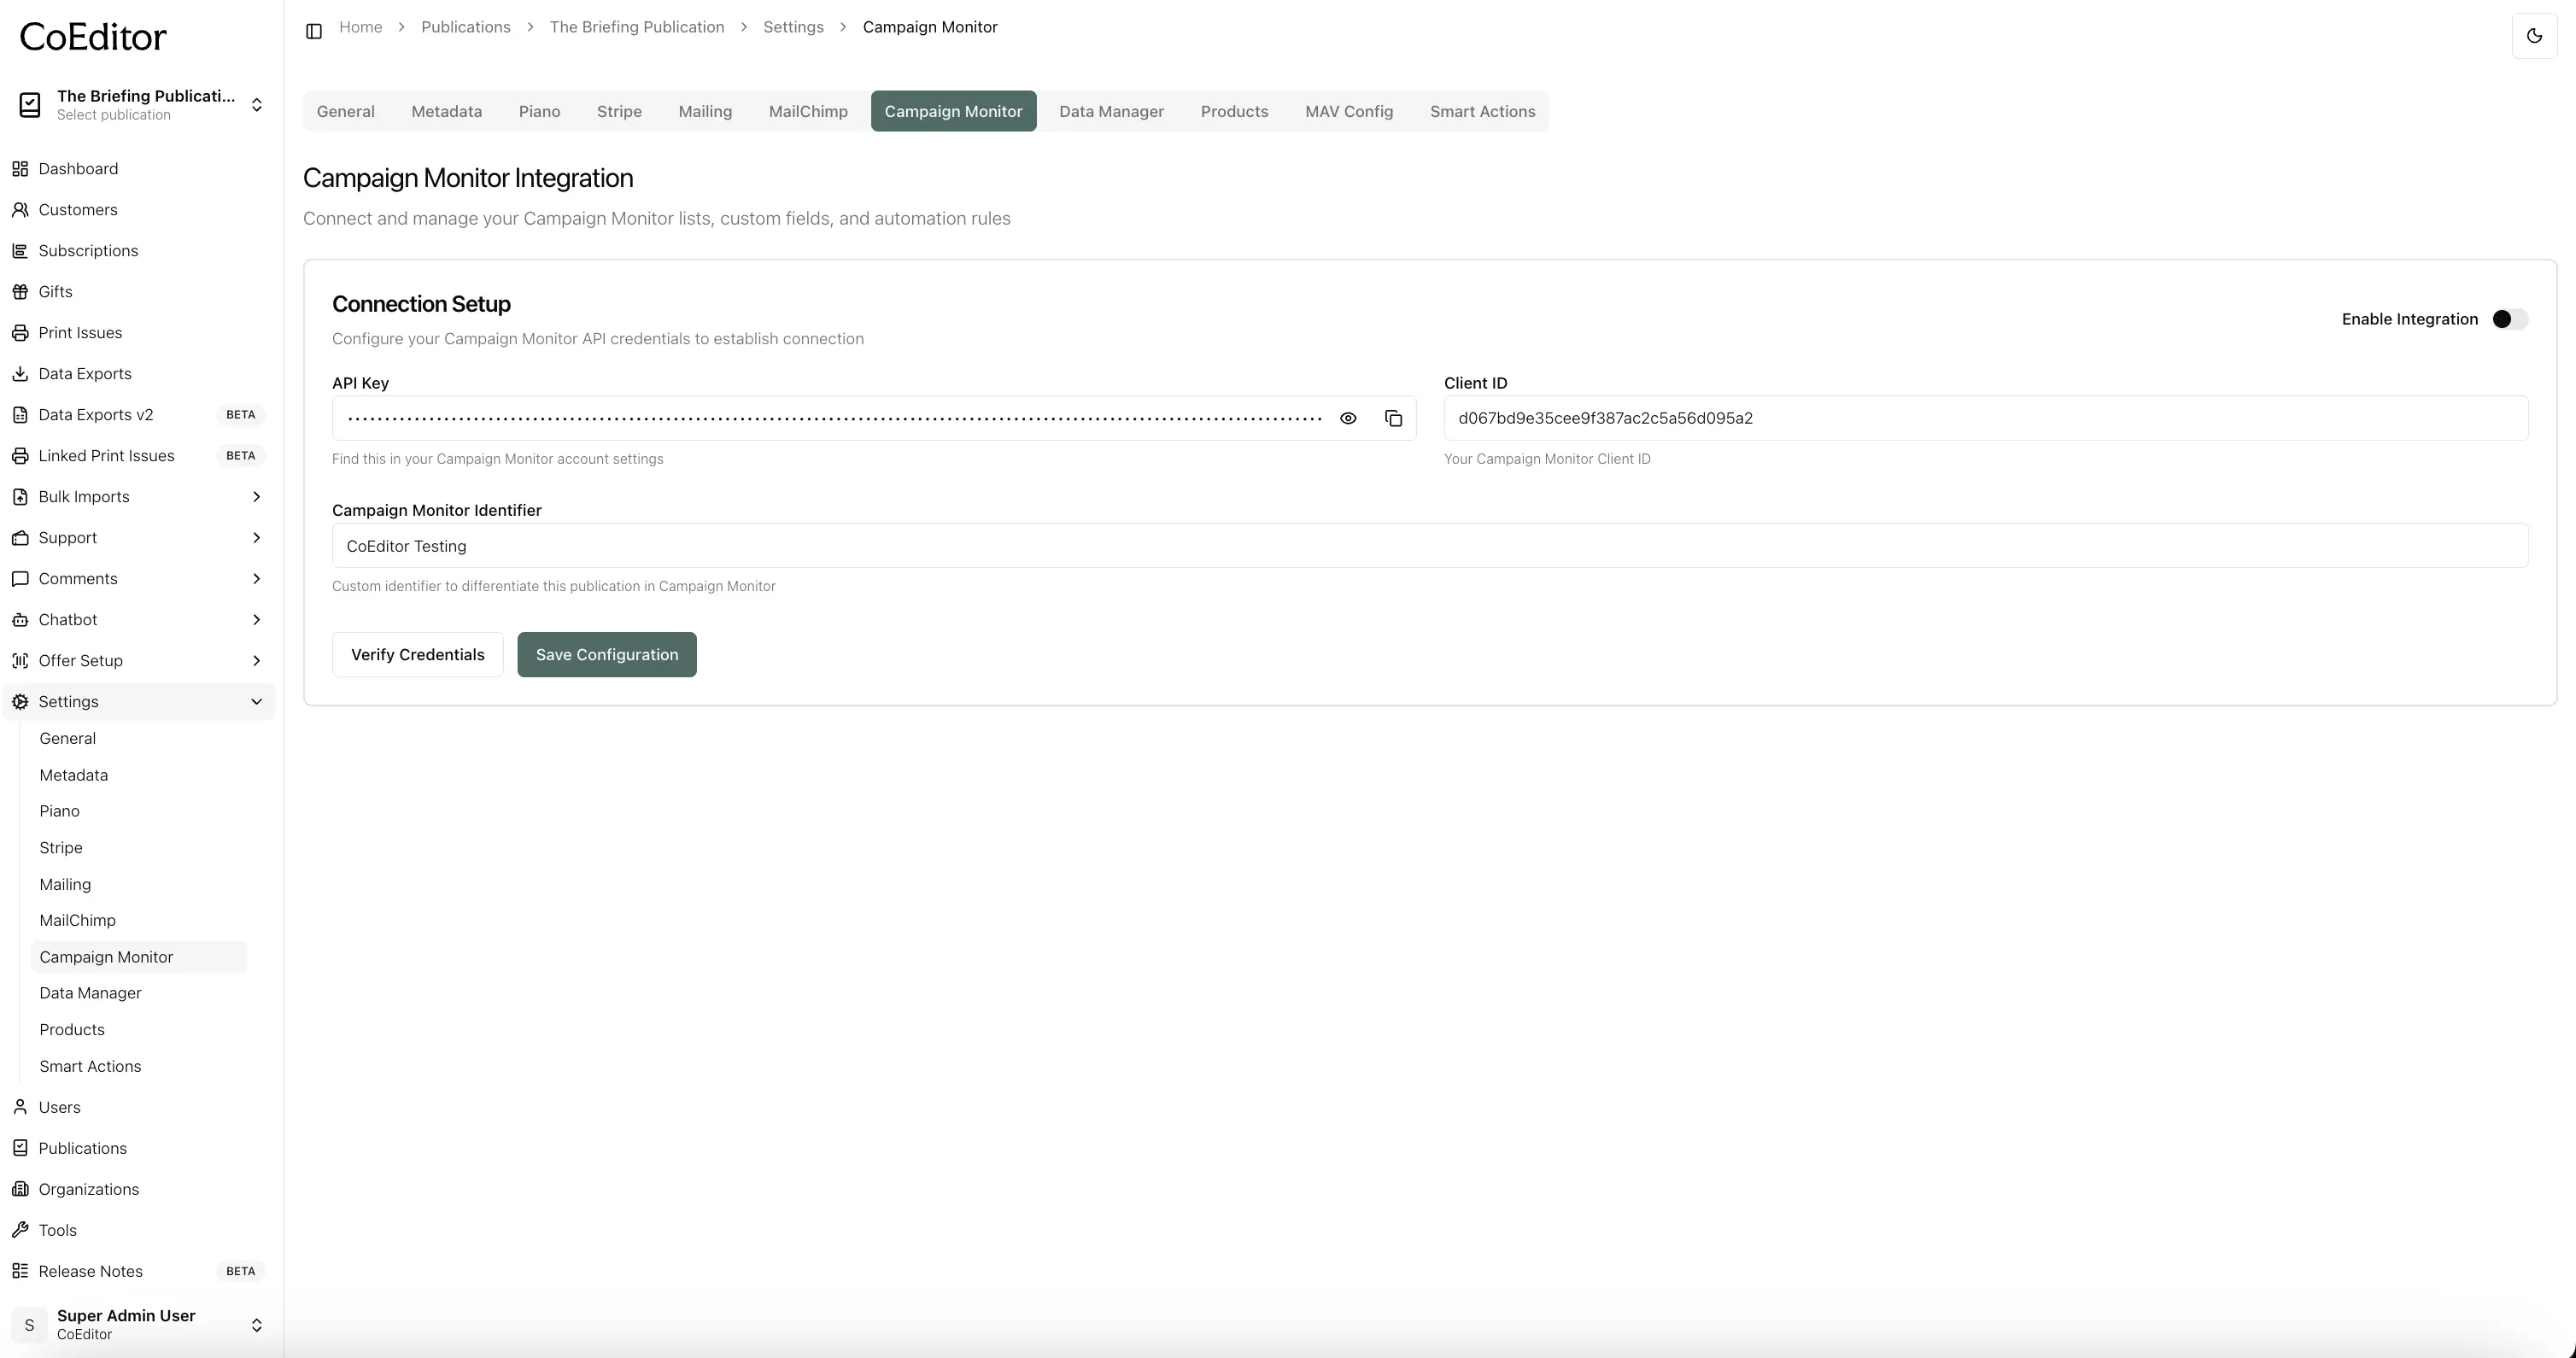
Step 3 — Sync your lists
Once credentials are saved and the integration is enabled, the Audience / Lists and Rules tabs appear.
- Stay on (or open) the Audience / Lists tab.
- Click Sync from Campaign Monitor.
CoEditor pulls your Campaign Monitor lists and their custom fields into the CRM. Run sync again whenever you add or change lists or fields in Campaign Monitor — changes made directly in Campaign Monitor are not reflected here automatically.
You can also click Create List to add a list from the CRM, or Reload to refresh the table without a full sync.
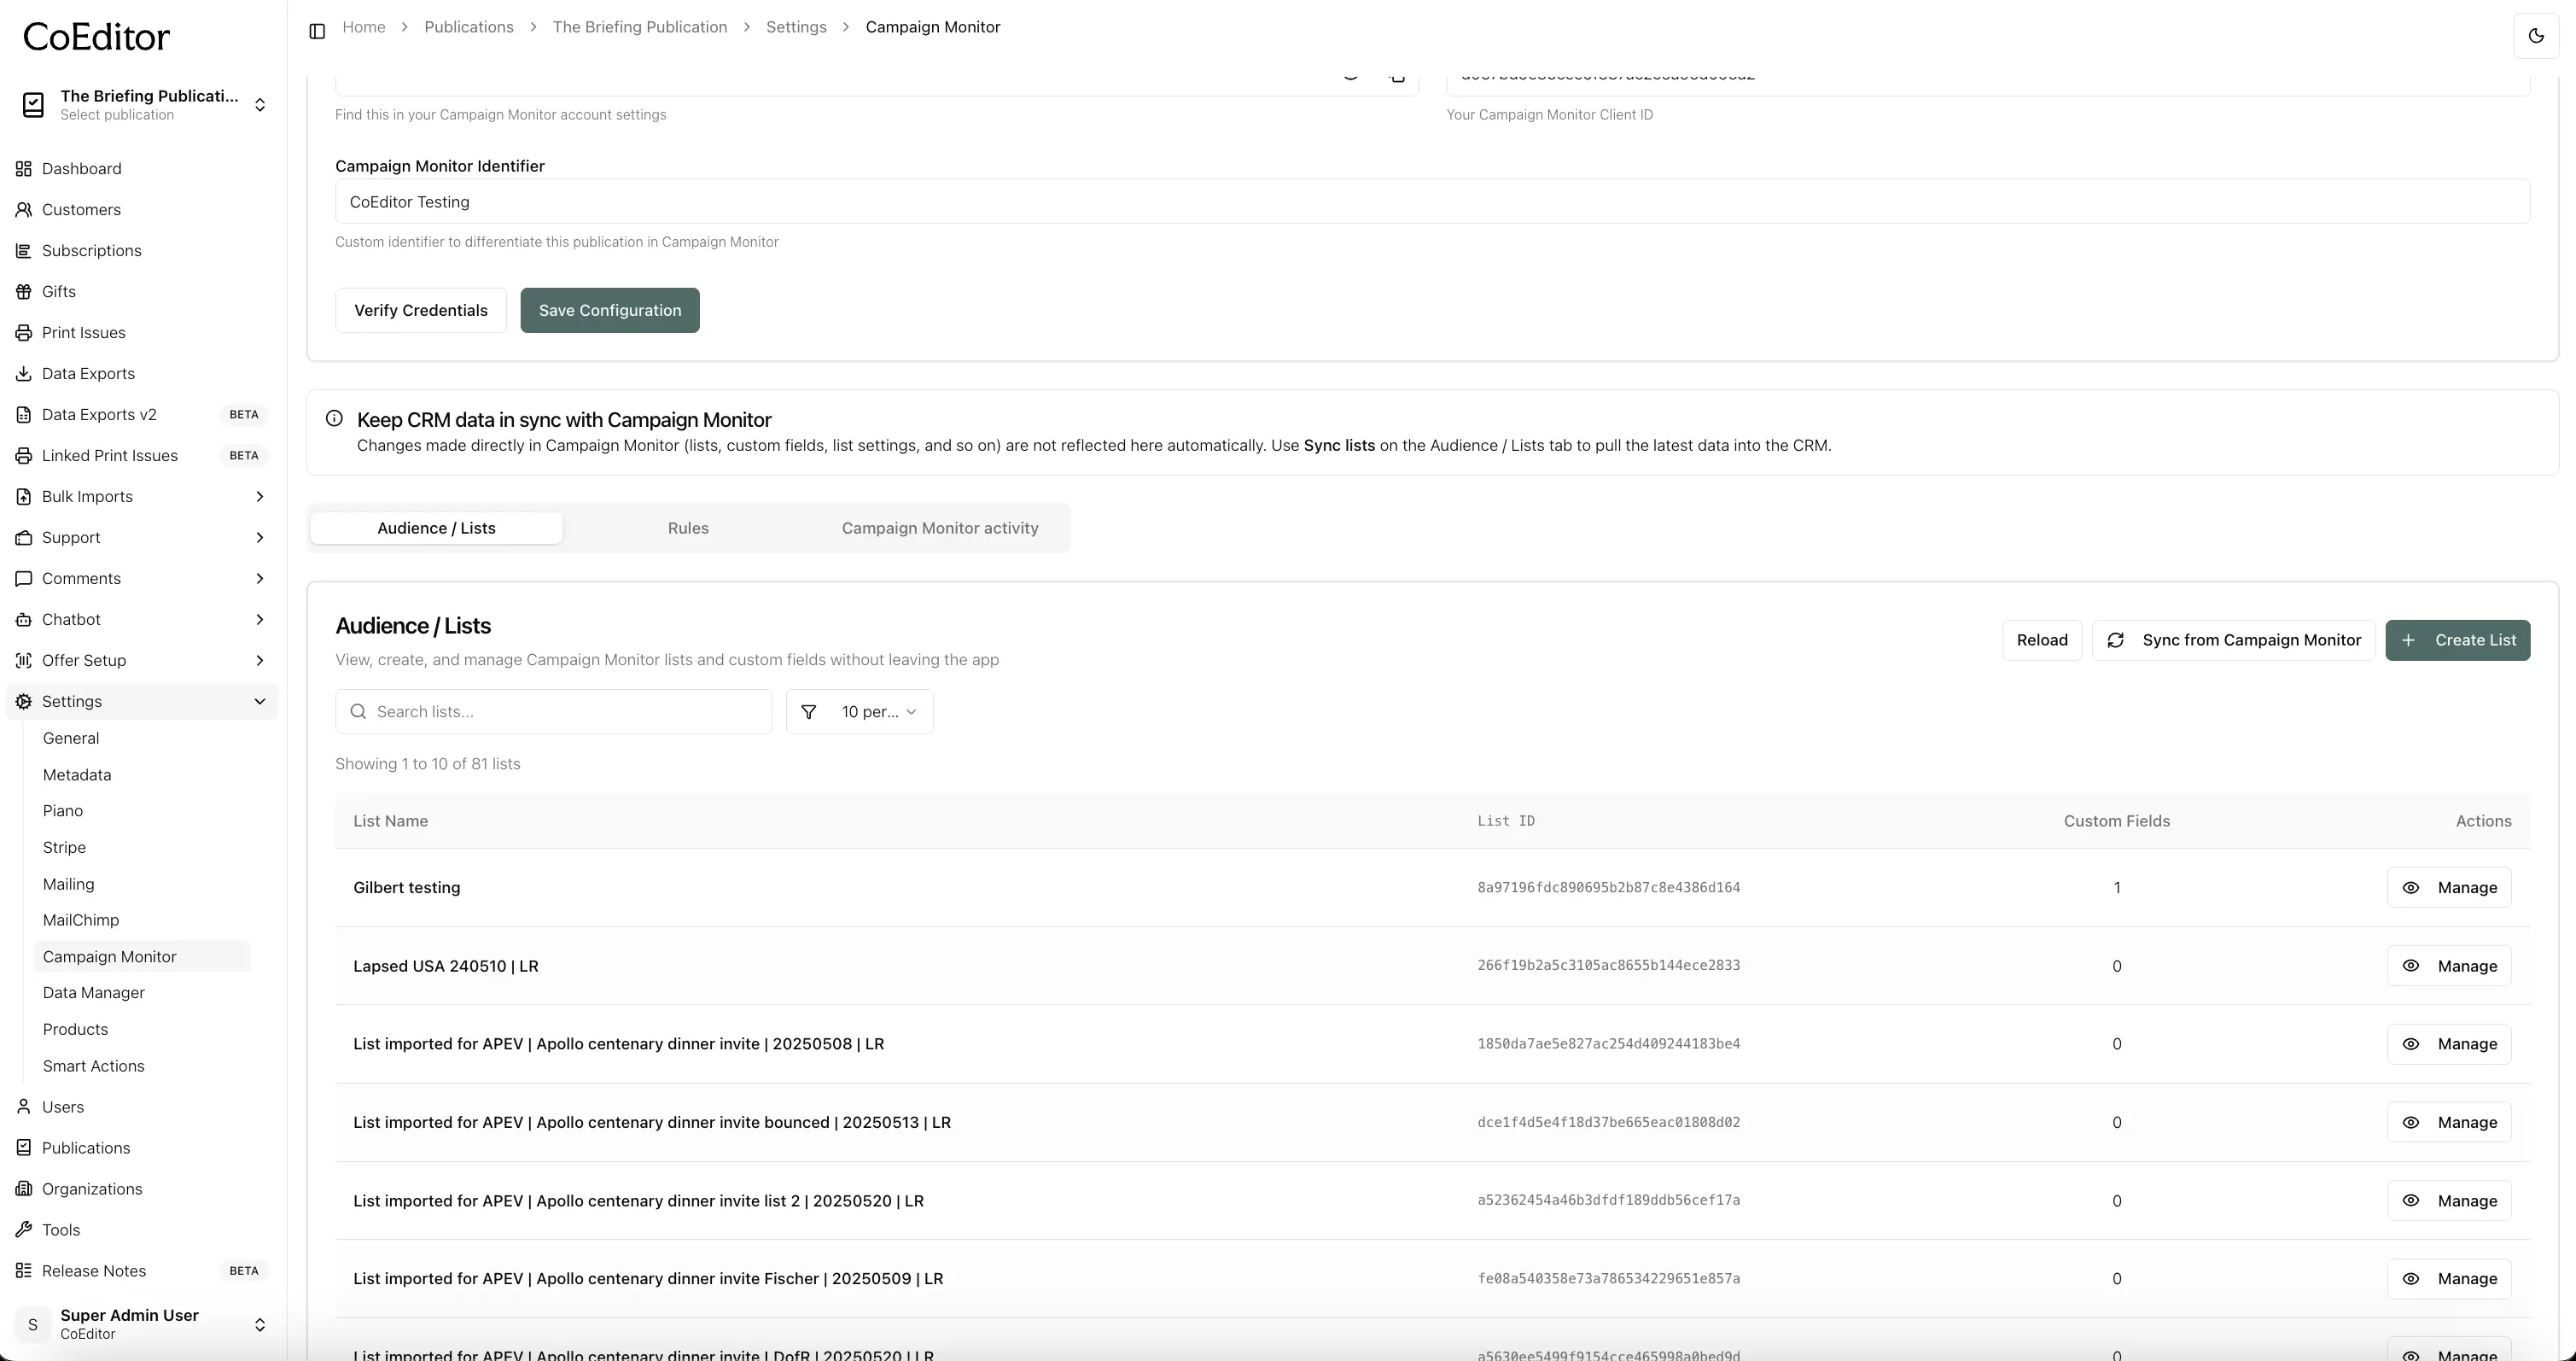
Step 4 — Review lists and custom fields
Before building rules, confirm the lists and custom fields you plan to use are present in the CRM.
- In the Audience / Lists table, find the list you need.
- Click Manage on that row to open the list detail sheet.
- Review Custom fields — add, edit, or remove fields if needed (fields must exist on the list in Campaign Monitor for rules to update them).
- Close the sheet and repeat for other lists your automations will target.
Rules reference lists and custom fields from this catalog. If a list or field is removed in Campaign Monitor later, affected rules show a Needs attention badge until you fix or re-sync.
Step 5 — Open Rules
When your lists are synced:
- Open the Rules tab on the same page.
- Click Add Rule to create a new automation (or use Create First Rule if the table is empty).
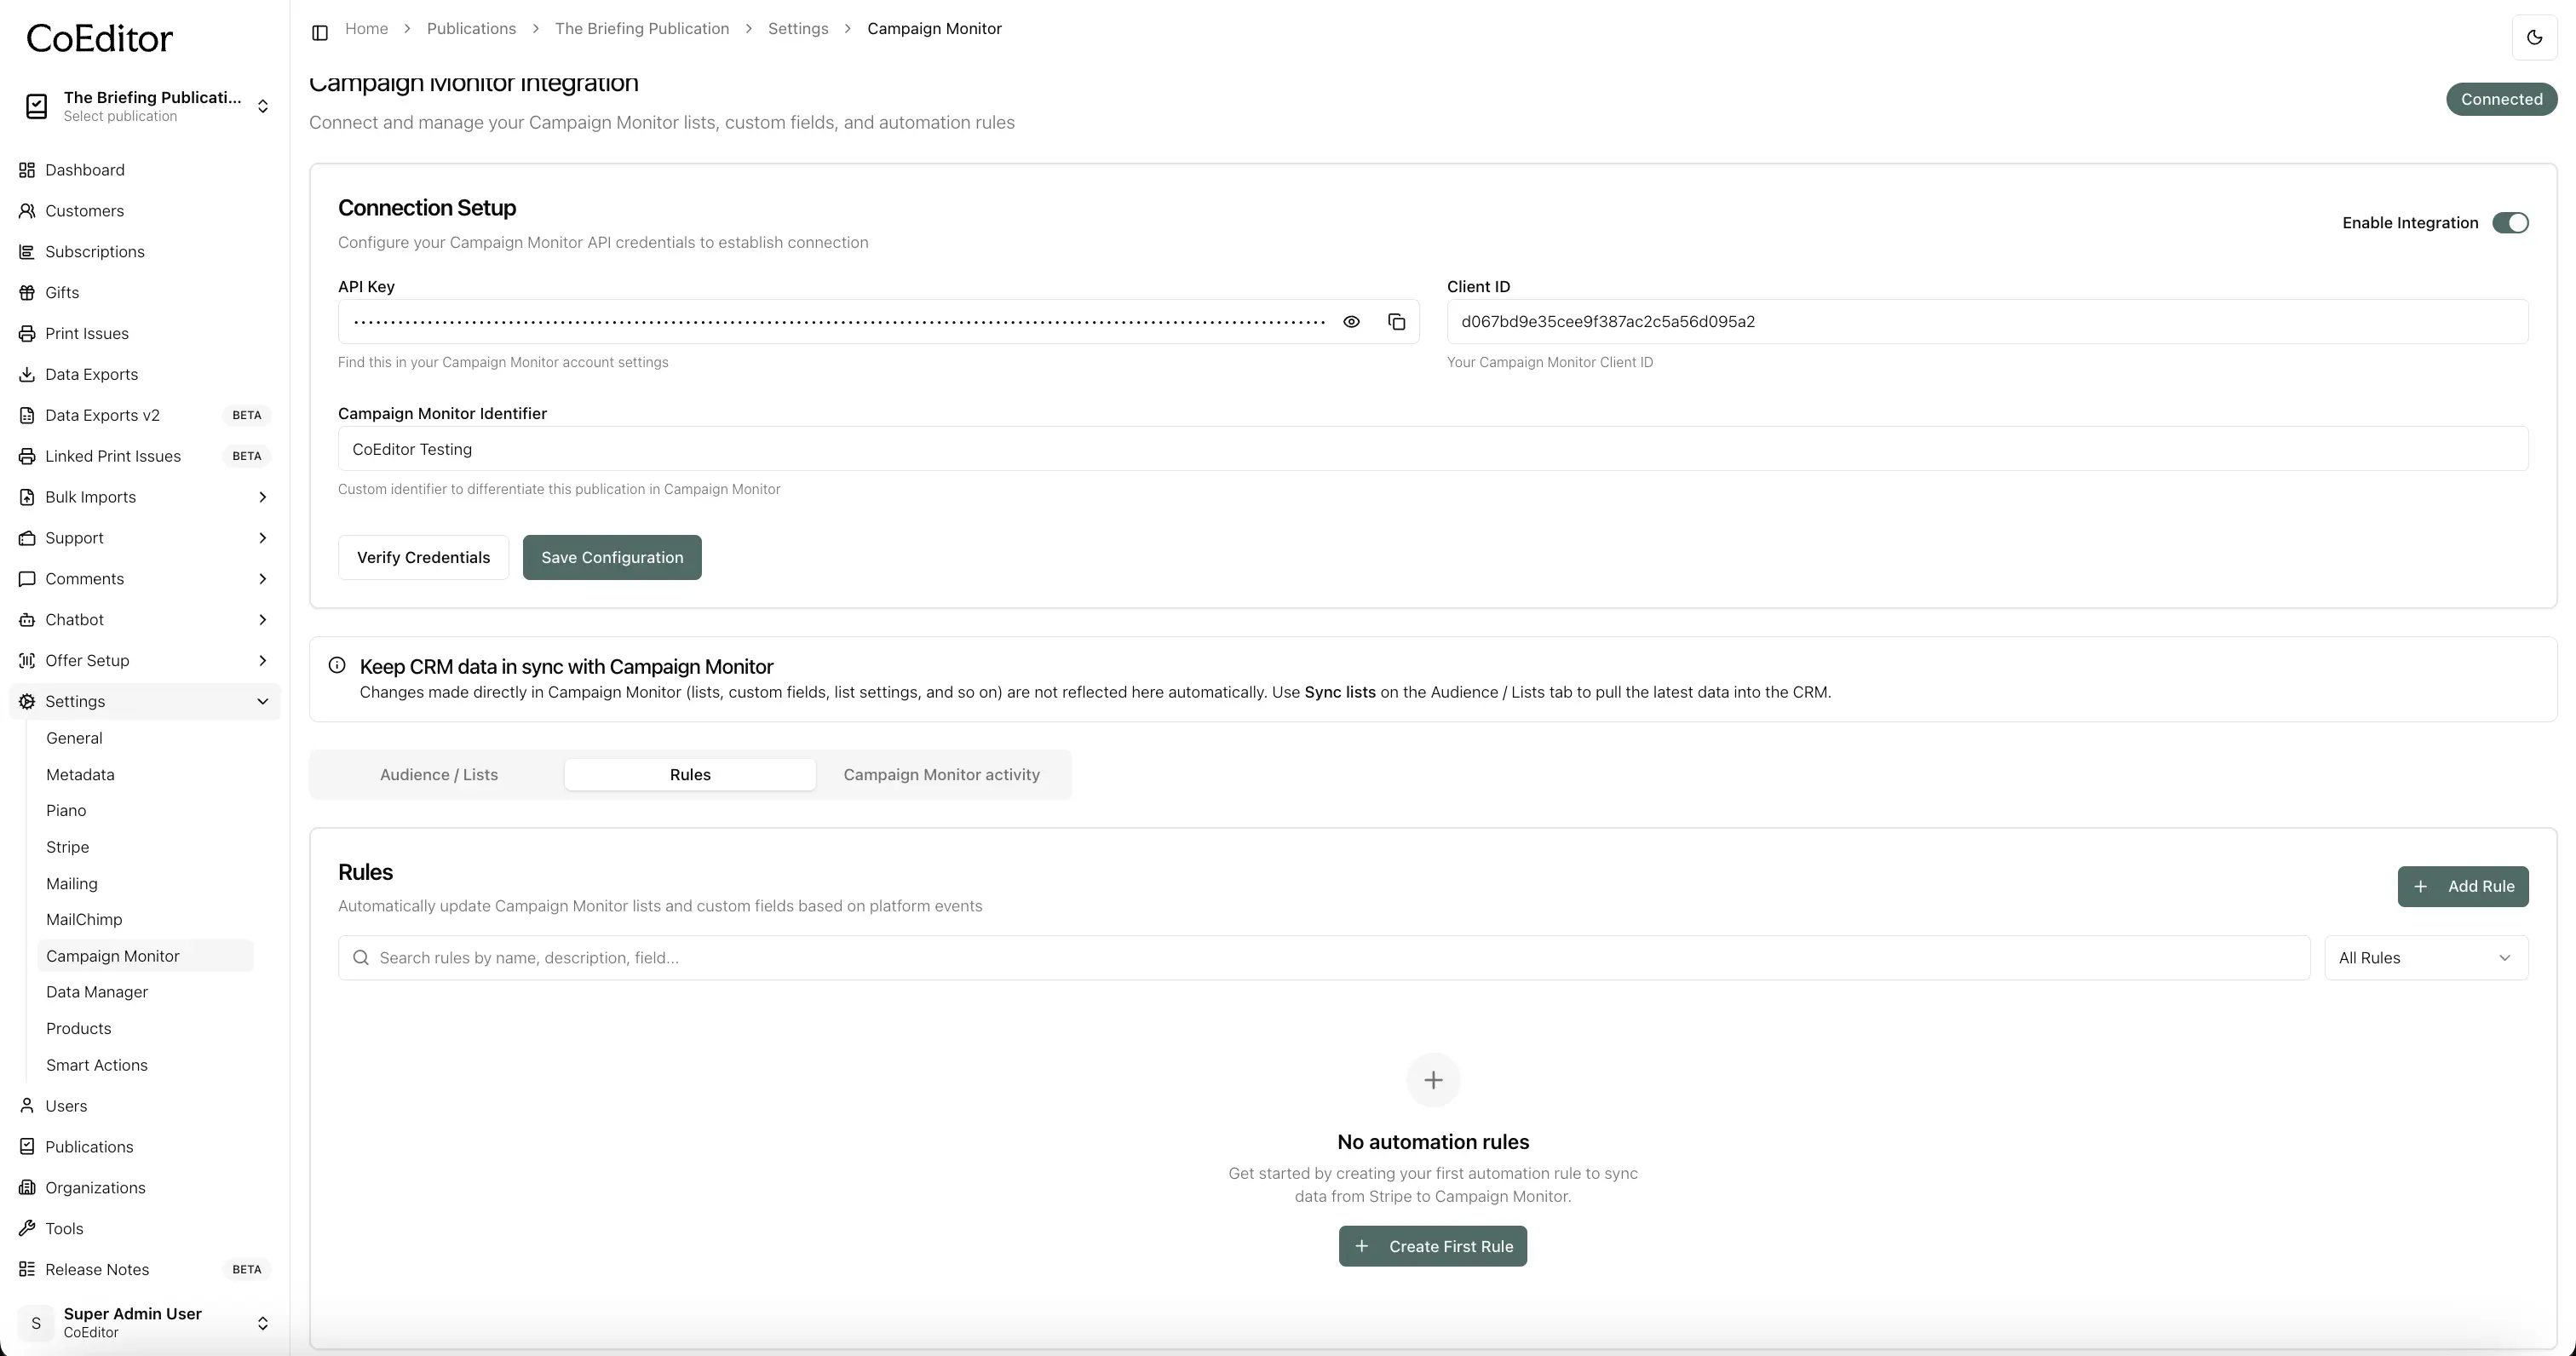
Step 6 — Create an automation rule
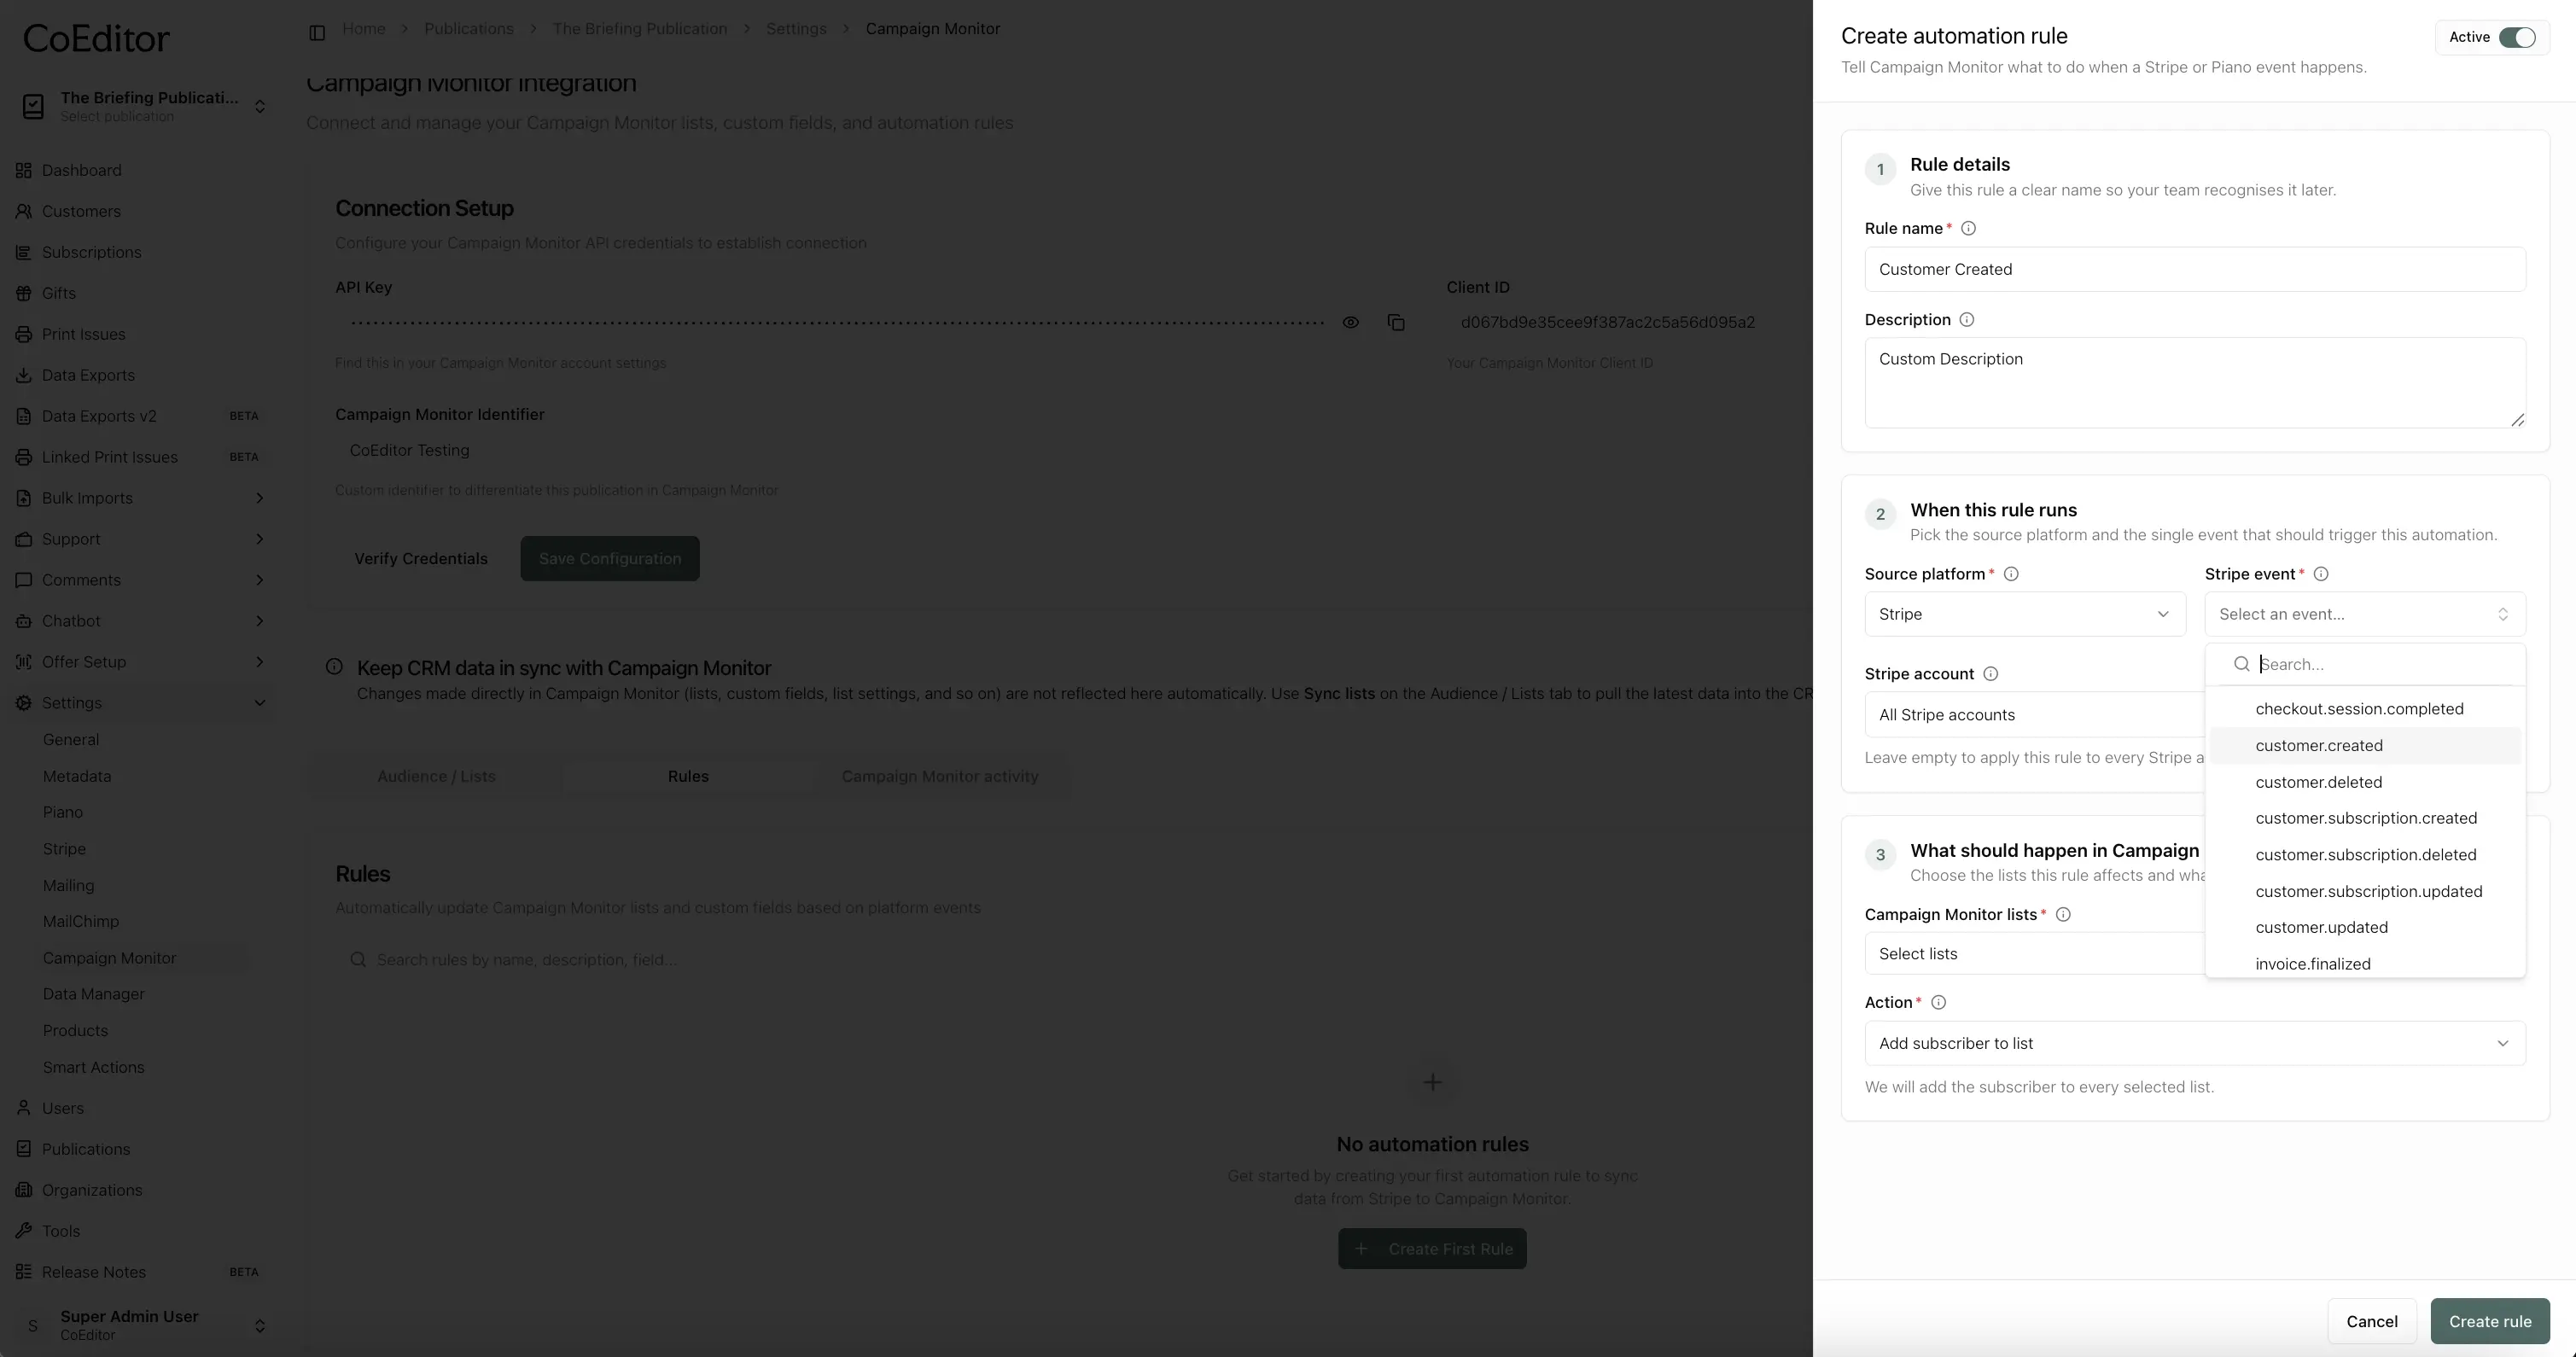
The rule editor opens as a side panel with four steps. Work through them top to bottom.
6a. Rule details (Step 1)
- Enter a Rule name and optional Description.
- Use the Active toggle in the header — leave it off while testing; turn it on when you are ready.
6b. When this rule runs (Step 2)
- Select Source platform — Stripe or Piano.
- Select the event that should trigger this rule (for example
customer.createdorcustomer.subscription.updated). - For Stripe, optionally limit the rule to one Stripe account, or leave All Stripe accounts to apply it everywhere.
Each rule handles one event per platform (and optional Stripe account scope). Create separate rules for additional events.
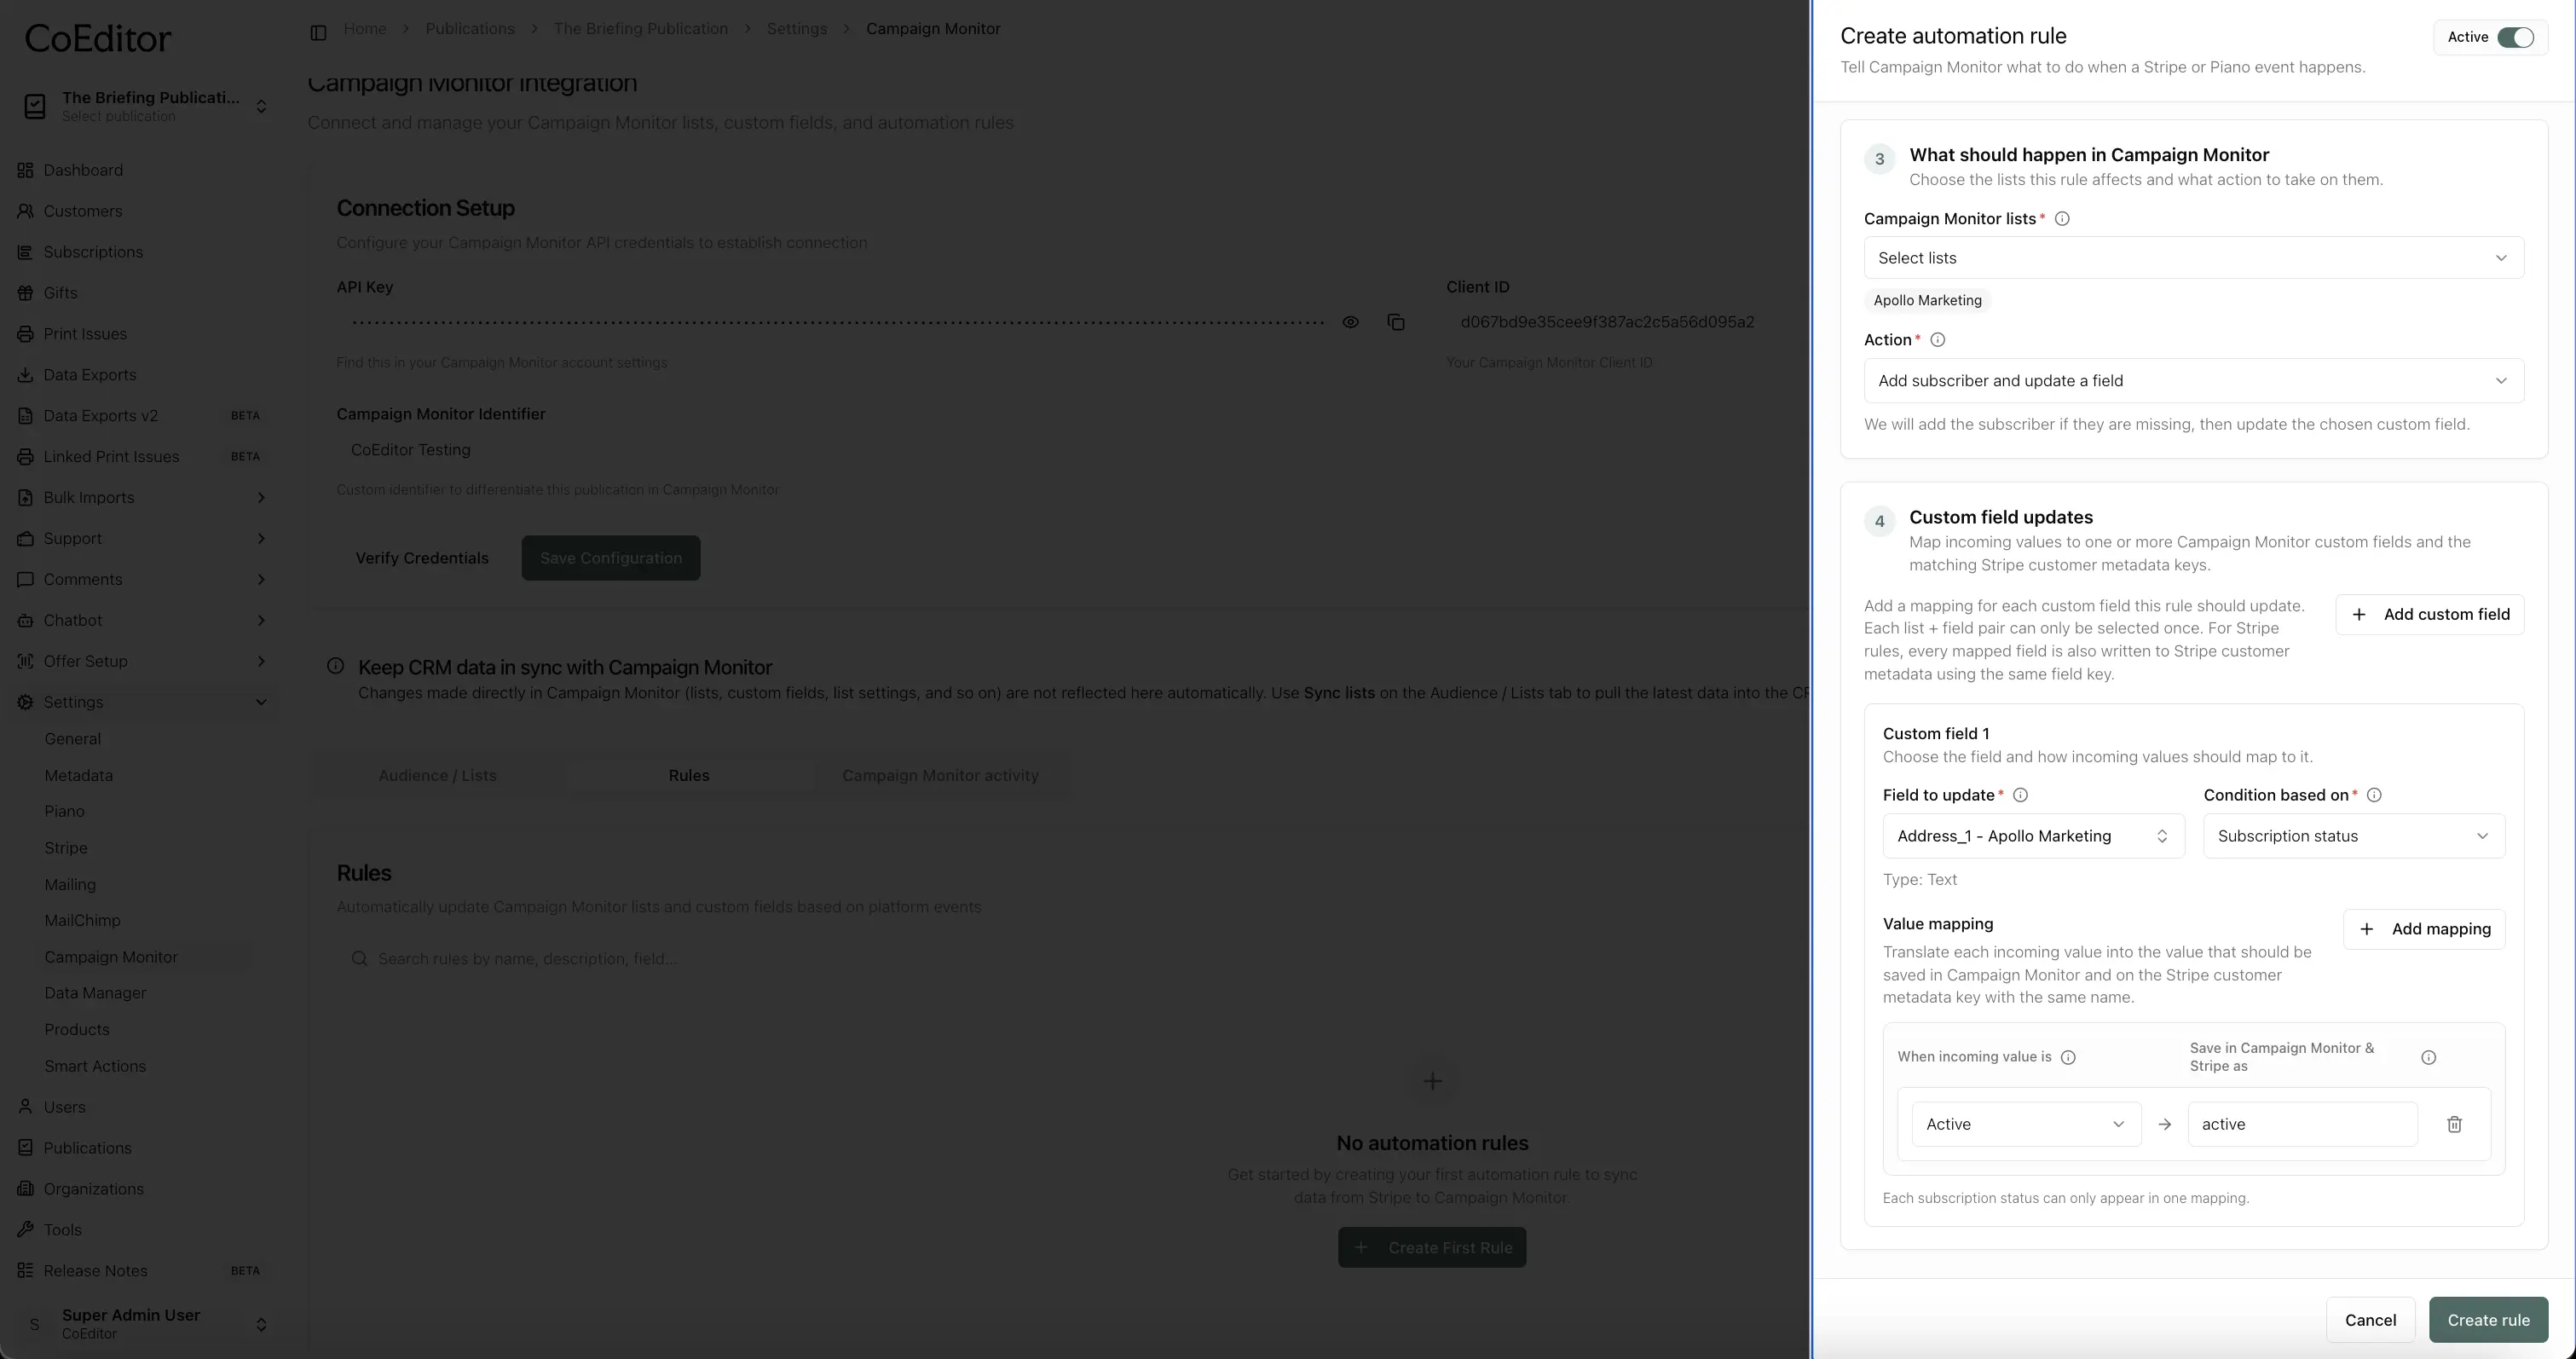
6c. What should happen in Campaign Monitor (Step 3)
- Select one or more Campaign Monitor lists the rule should affect.
- Choose the Action:
| Action | What it does |
|---|---|
| Add subscriber to list | Adds the contact to every selected list |
| Update a custom field | Updates a custom field for subscribers already on the list |
| Add subscriber and update a field | Adds the contact if missing, then updates the chosen custom field |
6d. Custom field updates (Step 4)
This step appears when the action includes a custom field update (Update a custom field or Add subscriber and update a field).
For each field mapping:
- Click Add custom field.
- Choose the list and custom field to update.
- Select a Condition type:
- Subscription Status — map Stripe subscription statuses (for example
active,past_due,canceled) to field values. - Country + Subscription — combine country and subscription context (for example
active,nonUk,fallback).
- Subscription Status — map Stripe subscription statuses (for example
- Add value mappings — pair each incoming webhook value with the value written to the Campaign Monitor field (or use the event trigger date for date fields).
For Stripe rules, mapped fields can also sync to Stripe customer metadata using the same field key.
You can add multiple custom-field mappings in one rule. Each list + field pair can only be selected once.
6e. Save and review
Save the rule. It appears in the Rules table where you can search, filter, enable or disable it with the toggle, edit it, or delete it. Rules with missing lists or fields show Needs attention — open the rule to repair references or re-sync lists.
Reference — What the integration does
After Campaign Monitor is connected, CoEditor can:
- Add or remove a contact on an email list
- Add, update, or remove custom field values on a list member
Rules are driven by system events in CoEditor once Stripe or Piano webhooks are configured.
Example workflows
Customer created → add to list
When customer.created fires, a rule with action Add subscriber to list adds the contact to your welcome or daily mailing list.
Subscription created → set custom field
When customer.subscription.created fires, a rule with action Add subscriber and update a field can:
- Add the contact to the target list if they are not already on it
- Set a custom field such as Subscribe status to
Activewhen the subscription status isactive
Subscription updated → refresh status
When customer.subscription.updated fires, map status values (active, past_due, canceled) to the appropriate custom field values without changing list membership.
Common trigger events
| Platform | Event | Common use |
|---|---|---|
| Stripe | customer.created | Add new contacts to a welcome list |
| Stripe | customer.subscription.created | Add to list and set status field to active |
| Stripe | customer.subscription.updated | Refresh custom fields when status or plan changes |
| Stripe | customer.subscription.deleted | Update fields to reflect churn or remove from lists |
| Piano | subscription.create | Mirror access changes into Campaign Monitor |
| Piano | subscription.update | Update custom fields when access changes |
| Piano | subscription.cancel | Update fields or list membership on cancel |
Only events enabled for your publication appear in the rule editor. If the list is empty, finish Stripe/Piano setup under Settings → Webhooks first.
Tips when building rules
- One rule = one platform event (per Stripe account scope if set). Duplicate the rule for other events.
- Run Sync from Campaign Monitor after changes in Campaign Monitor so lists and fields stay current.
- Custom field keys in Campaign Monitor must match the fields you select in the rule editor.
- Test with a single rule and a test list before enabling rules on production lists.
- Use the Needs attention filter on the Rules tab to find rules with broken list or field references.
Before you go live
- Run Sync from Campaign Monitor whenever you add lists or custom fields in Campaign Monitor
- Confirm every list and custom field referenced in rules still exists after sync
- Test with one rule on a test list before enabling production rules
- Connect Stripe and Piano so billing and access events reach your rules (webhook setup)
Related documentation
- Integrations overview
- Mailchimp — audiences, tags, and interest groups from CRM events
- Stripe and Piano in CoEditor — how external events sync into the CRM
Screenshots: Drop PNG/JPEG captures in apps/docs/public/images/integrations/campaign-monitor/ (same basename, .webp in MDX), then run pnpm --filter @coeditor/docs images:webp.